Guide to Add e-Invoice QR Code in Print Formats
This guide provides instructions on how to add an e-Invoice QR code to print formats. It covers both custom print formats and standard print formats.
Custom Print Format
To add a QR code to a custom print format, use the following code snippet:
{% if doc.irn %}
{% set e_invoice_log = frappe.db.get_value(
 "e-Invoice Log", doc.irn, ("invoice_data", "signed_qr_code"), as_dict=True
) %}

{%- set invoice_data = dict(json.loads(e_invoice_log.invoice_data)) -%}

<img src="data:image/png;base64,{{ get_qr_code(e_invoice_log.signed_qr_code, scale=2) }}" class="qrcode">
{% endif %}
TIP
You can also check out the implementation in the Standard e-Invoice print format for further guidance.
Standard Print Format
To add an e-Invoice QR code to a standard print format, follow these steps:
1. Create a Web Template for the QR Code
- Open the Web Template List using the awesome bar and add a new Web Template.
- Enter the name of the Web Template as "e-Invoice QR Code"
- Select Type as "Component"
- Select Module as "Printing"
- Copy the following code snippet into the template field:
<img src="data:image/png;base64,{{ get_qr_code(qr_text, scale=2) }}" class="qrcode">2. Add the following fields in the child table "Fields"
- Label: QR Text
- Fieldname: qr_text
- Field Type: Text

3. Adding the fields in print format
- Go to the print format where you want to add the QR Code. and click on
Edit Format. - Add a custom HTML section.
- Insert the following code snippet into the custom HTML section:
{% if doc.irn %}
{% set e_invoice_log = frappe.db.get_value(
 "e-Invoice Log", doc.irn, ("invoice_data", "signed_qr_code"), as_dict=True
) %}

{%- set invoice_data = dict(json.loads(e_invoice_log.invoice_data)) -%}


 {{ web_block('e-Invoice QR Code', values={'qr_text': e_invoice_log.signed_qr_code }) }}
{% endif %}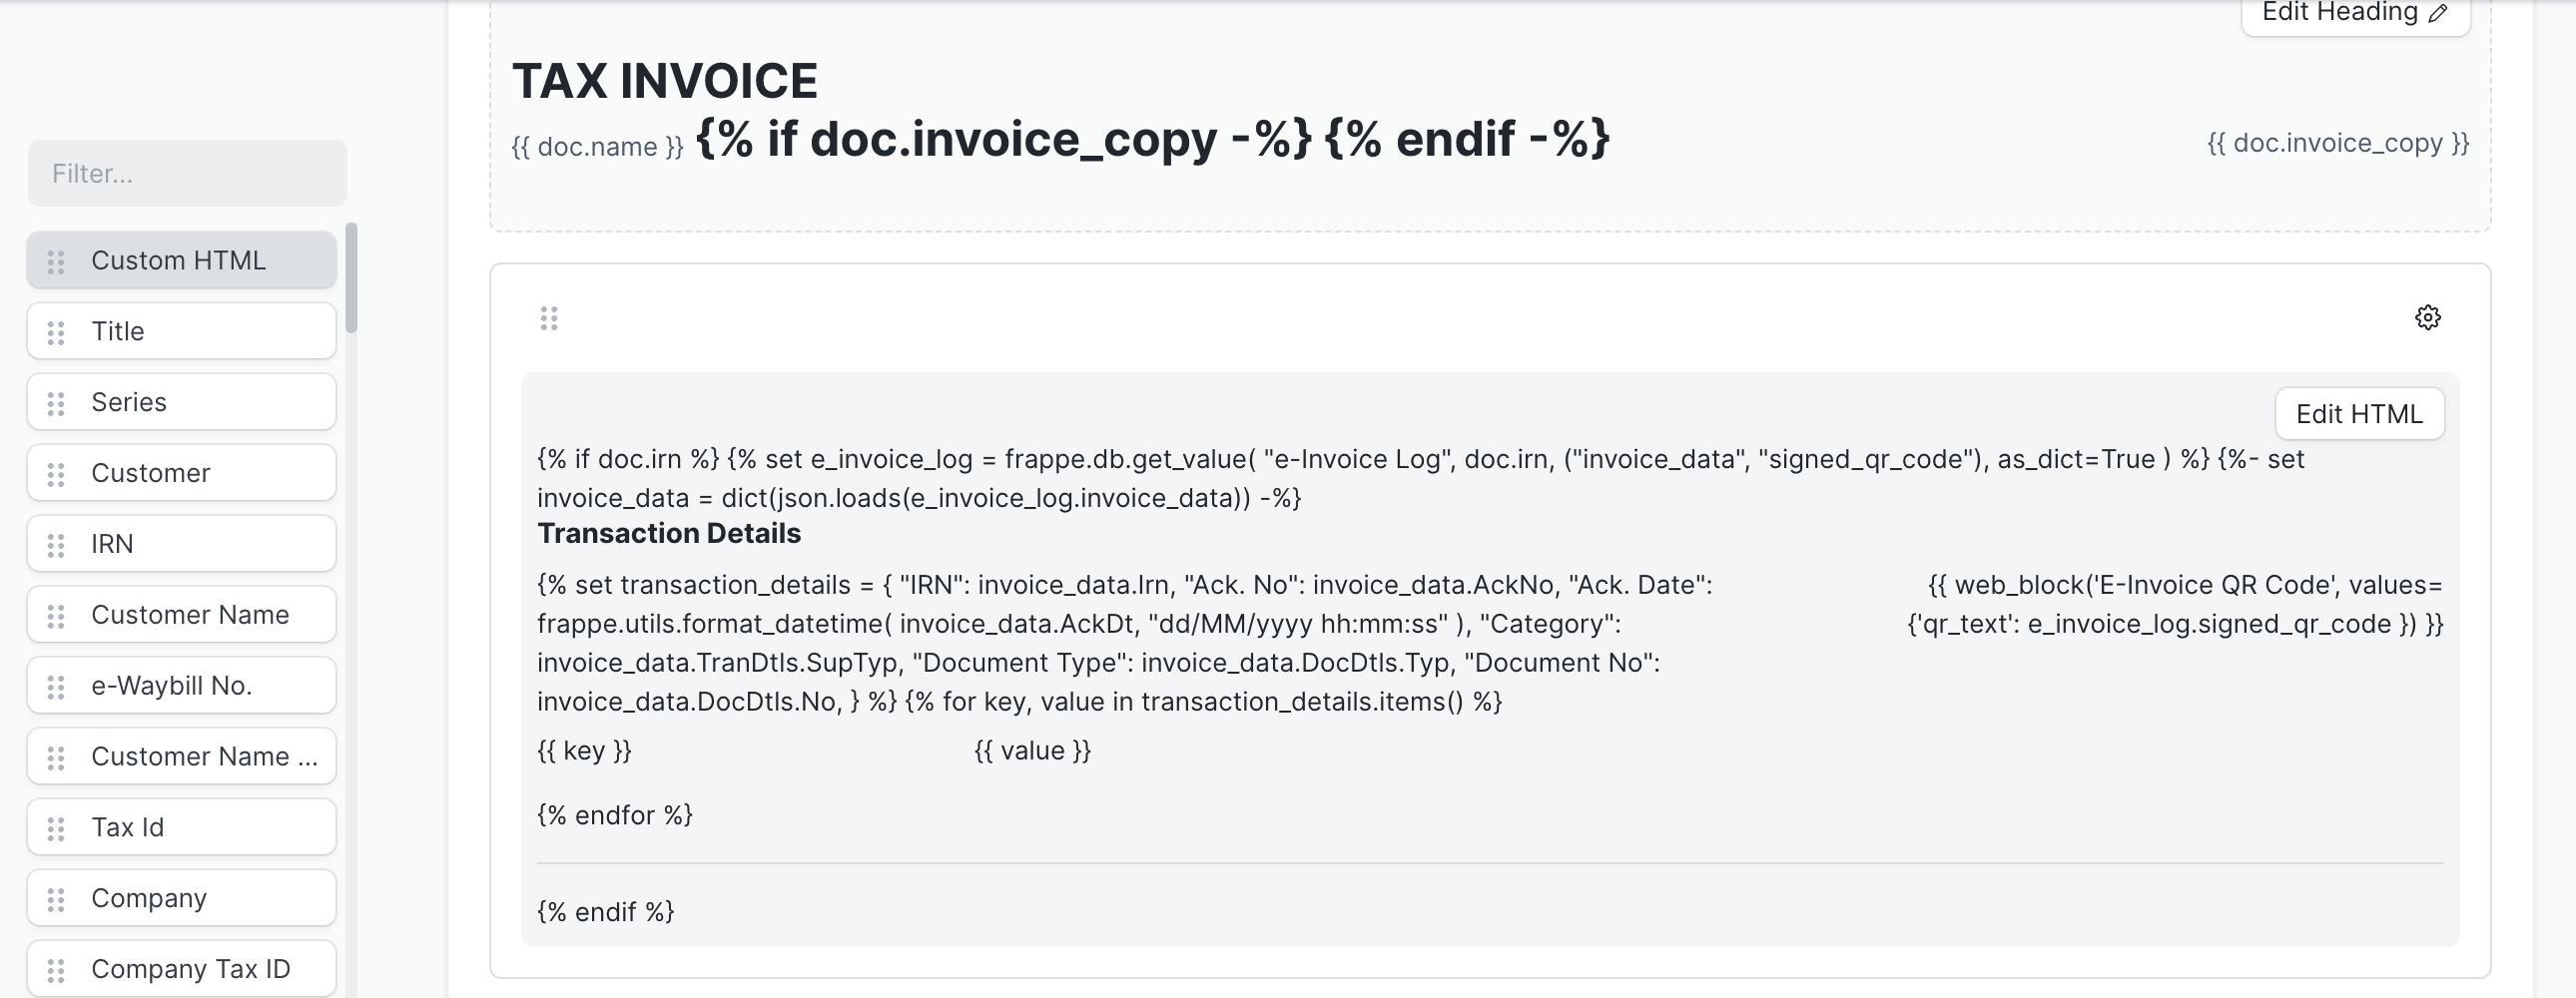
WARNING
Make sure the name mentioned in web_block exactly matches the name of your Web Template.